
Here is the before photo of our patio table. As you can see, there really isn't anything wrong with it (except that it's really drab). It's still in good shape and looks decent enough. But we had always talked about mosaicing it and decided we wanted to show our team spirit in the process. So, we went with a Seminole head in the center and some type of border that would be decided later (I don't usually wing it when it comes to designs, but I had trouble envisioning anything and just dove right in). This kind of indecision makes me procrastinate more than I should!
Throughout this post I'll show you the steps I took to use stained glass to mosaic my design on this table. The tabletop is a composite wood product which contained a laminate surface on the top and bottom. Since the table had been exposed to the weather for at least 10 years and still showed no sign of wear, warping or swelling, I decided I could mosaic right on the surface. Some people suggested replacing the top with concrete board, but that presented more problems than I was willing to deal with and I just went ahead with my plan.

The first thing I had to do was patch the umbrella hole. I taped a piece of cardboard over the hole on the top of the table and put it top down on the patio. Then I used a spray insulation and filled the hole. My thinking was that I would have a smooth surface on the top after removing the cardboard and would be able to just cut the excess from the bottom.
Actually I thought that was pretty logical thinking until I removed the cardboard from the top. Of course, the insulation stuck to the cardboard and some of the insulation came off. I didn't completely freak out and decided that when I started to mosaic, I would just fill in with thinset. It ended up being a pretty easy fix!!

Here's a picture of my initial pattern. I think the cartoon looks a little childish but in the back of my mind there was some vision there and, most importantly, a border plan. I did enlarge the center medallion a little and really thought I would use this border (more on that later).

I transferred the center "medallion" pattern to the table using carbon paper. It's a little difficult to see in this picture, but you can see the outline of the Seminole head drawn on the table. (Click on the pics to enlarge and see more detail).
Now, it's time to get down and dirty with the real work! I had gathered all my materials: glass, glass cutter, wheeled nippers, thinset, containers for mixing, a jug of water and various and sundry tools that I thought I would need. Oh, and let's not forget the band-aids!!

Here's what I accomplished after my first day of work. Thankfully, I started this project on Labor Day weekend, Mr. Man was working and I had the whole day to myself. I had anticipated getting a little further along, but I was a little slow to start, I guess.
After working with the table at regular height, my back was killing me! I had some bed risers that I use for my tables at shows and put them under the table legs. Worked well, but it still wasn't tall enough. Mr. Man had a great idea to put my folded show table under the risers and it worked perfectly! If you ever decide to do this type of project, be sure you can raise your work surface to a comfortable height. You'll be glad you did!!

I kept going back and forth with using the tweezers and toothpicks. Whatever it takes to get those little pieces perfectly situated!

Here's what I finished the first weekend (with several breaks, a football game and a family get-together). I was quite pleased with my progress so far. I didn't think that was too bad!
Of course, with projects this large, I have trouble just stopping and picking up later. The total project took me 3 weeks and I worked on it in the evenings and weekends every minute I could fit in there. Of course, this meant that I was working in the dark sometimes and since I don't have a real shop to work in, I was outside under the patio (thank goodness for good weather). Although my radio kept me company, it was still a little scary after dark.
Until I started this project, I didn't realize that we had a resident 'possum! Every night about dark-thirty, that little rascal would come sneaking out of the little creek (a/k/a ditch) beside our property and stroll across the lawn. A little freaky the first couple of times I saw him, but I considered him company after a while!!!


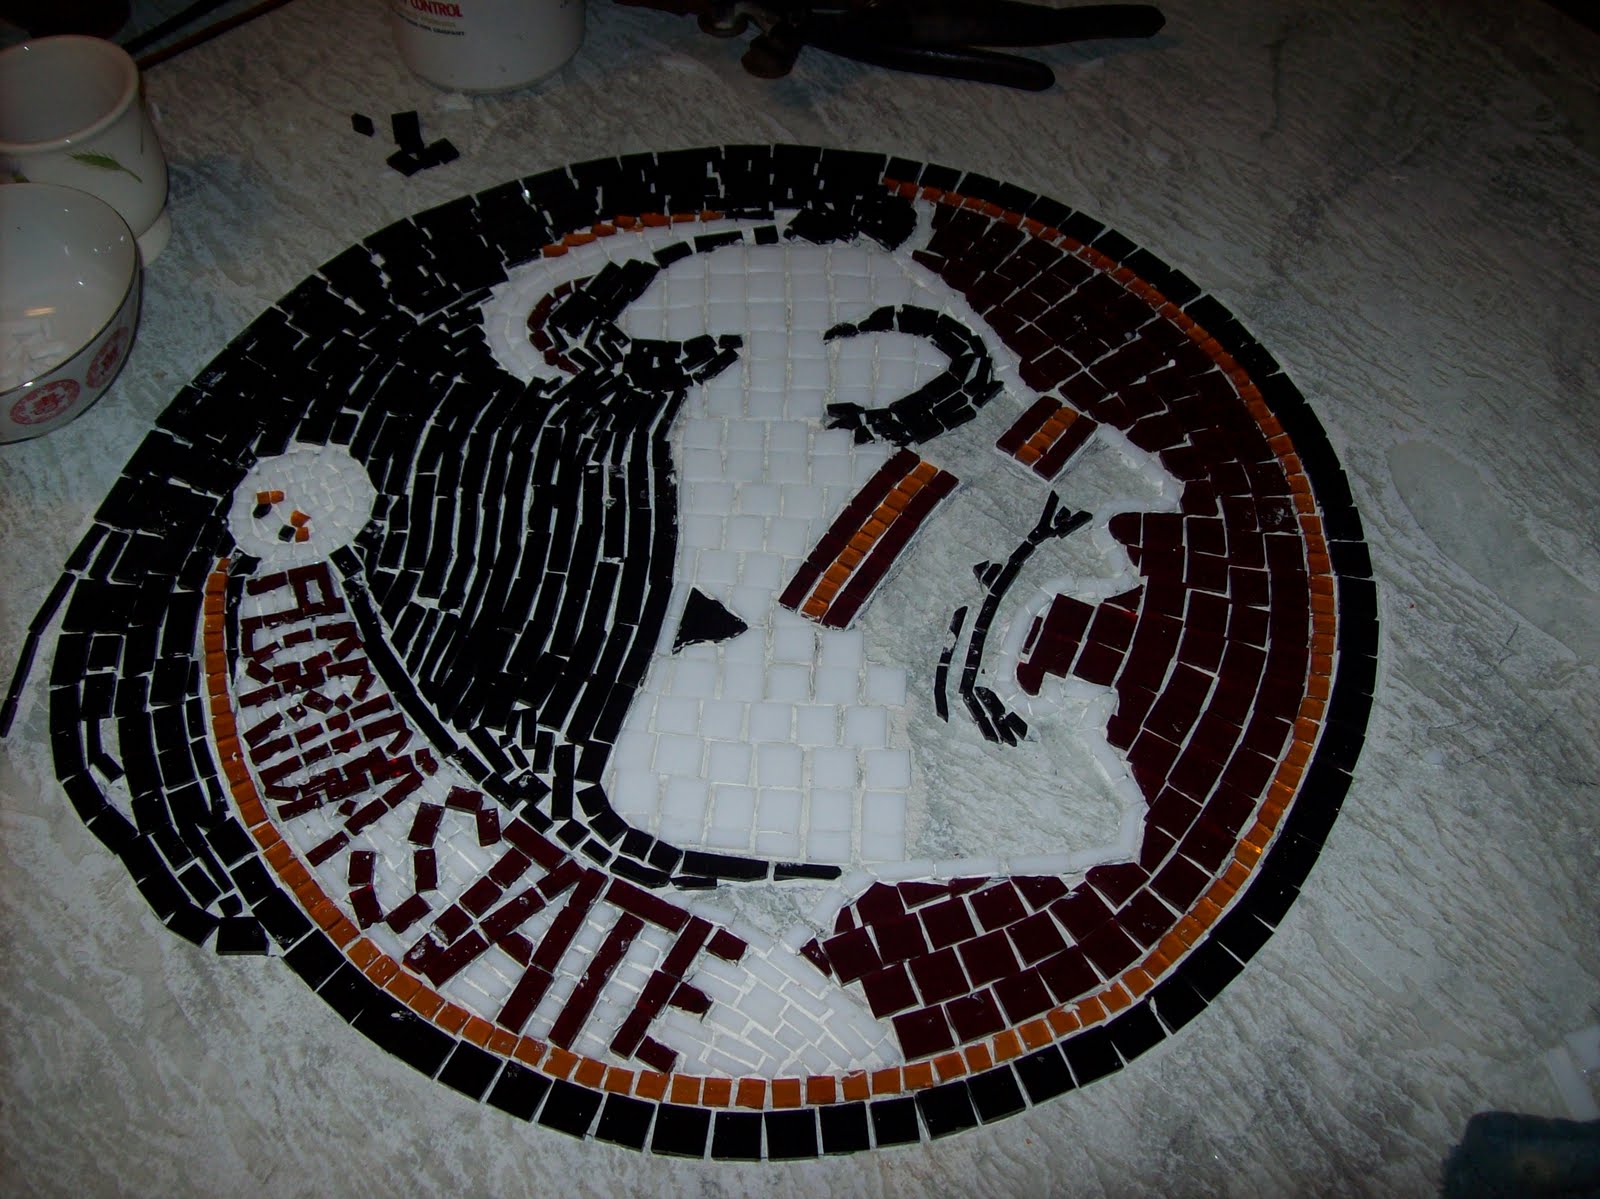
I still had not decided on what to do with all that space between the medallion and the outer edge of the table. I talked about adding a little something to take up all that white space (like "FSU" or a feather or tomahawk in various places), but after I got to this point, I was ready to just get the border glued down and then fill in with white. I toyed with this idea but didn't like using so many colors for the border.
Finally, I decided to go with this border and use white square tiles to fill in.

Here's a work in progress while laying down all that white! I know it looks like a lot of white, but I was surprised at how quickly I got it done.

All the white is finally filled in! Next, I had to scrape off the excess glue and get ready for grout.
I wanted all the white tiles grouted in white and the rest in black. I first taped off the areas that would get white grout (the face, feather and background) so I could apply the black grout. I didn't completely tape off the white background area because I was sure I wouldn't go outside the taping.
This is the scariest part of making a mosaic for me. I know the black grout will cover all my glass and will look horrible and it will appear there is no return at that point. But, after using the damp sponge and the glass starts shining through, there is an amazing transformation! Although I knew better, I didn't wear gloves during this process. Gloves just feel very clumsy to me and I thought I could just wash off the grout afterwards. Wrong!!! It took quite a bit of scrubbing with various soaps to get all that black off my hands and from around my cuticles. Yuck! Next time I'll wear gloves.

Here's the table after applying and cleaning the black grout.
Next, I had to tape off the black areas and get ready for white grout. This process just can't go fast enough for me at this point.
Of course, my timing is usually a little off. The evening I was ready to spread the white grout, the "love bugs" showed up. You can see one of the little buggers at the top right (on the white tiles) in this picture. For those who don't know, "love bugs" take to the air twice a year in this area (usually May and September) and are a major pain. In addition to being a menace to car finishes, they are attracted to light colored objects (such as white tiles) and decided to make their flight when I was ready to apply my white grout!
Here's a close up of what happened after I spread the white grout and before I wiped it off. This was a pretty light season for the love bugs but still was an added distraction during grouting!
Yes, they fly in pairs ~ read more about them
here.
Finally, after cleaning all the grout and letting it sit for a few days, I was able to seal the grout and set the table back in its place.
Mr. Man thinks it's a masterpiece (I love my fans!) I realize that I'm a very inexperienced mosaicist and am extremely critical of my work (I see something wrong w/it everyday), but I'm pretty proud of this accomplishment.
Now, the patio really doesn't do the table justice and I think we'll have to do something about the patio next!!
 Please be sure to visit my booth and, if you mention this blog post, you will receive a 10% discount on any purchases at my booth.
 Here is the before photo of our patio table. As you can see, there really isn't anything wrong with it (except that it's really drab). It's still in good shape and looks decent enough. But we had always talked about mosaicing it and decided we wanted to show our team spirit in the process. So, we went with a Seminole head in the center and some type of border that would be decided later (I don't usually wing it when it comes to designs, but I had trouble envisioning anything and just dove right in). This kind of indecision makes me procrastinate more than I should!
 The first thing I had to do was patch the umbrella hole. I taped a piece of cardboard over the hole on the top of the table and put it top down on the patio. Then I used a spray insulation and filled the hole. My thinking was that I would have a smooth surface on the top after removing the cardboard and would be able to just cut the excess from the bottom.
 Here's a picture of my initial pattern. I think the cartoon looks a little childish but in the back of my mind there was some vision there and, most importantly, a border plan. I did enlarge the center medallion a little and really thought I would use this border (more on that later).
 I transferred the center "medallion" pattern to the table using carbon paper. It's a little difficult to see in this picture, but you can see the outline of the Seminole head drawn on the table. (Click on the pics to enlarge and see more detail).
 Here's what I accomplished after my first day of work. Thankfully, I started this project on Labor Day weekend, Mr. Man was working and I had the whole day to myself. I had anticipated getting a little further along, but I was a little slow to start, I guess.
 I kept going back and forth with using the tweezers and toothpicks. Whatever it takes to get those little pieces perfectly situated!
 I still had not decided on what to do with all that space between the medallion and the outer edge of the table. I talked about adding a little something to take up all that white space (like "FSU" or a feather or tomahawk in various places), but after I got to this point, I was ready to just get the border glued down and then fill in with white. I toyed with this idea but didn't like using so many colors for the border.
 Here's a work in progress while laying down all that white! I know it looks like a lot of white, but I was surprised at how quickly I got it done.
  All the white is finally filled in! Next, I had to scrape off the excess glue and get ready for grout.
 Here's the table after applying and cleaning the black grout.


