Friday, September 25, 2009

Fall Business Women Oline Expo - Booth #23


Hello! Welcome to my blog!

I'll start by telling you a little about myself. I'm a legal assistant by day and manic glass and china artist by night (and weekend). I love working with broken china and stained glass creating jewelry, suncatchers, home and desk items and just about anything in glass/china. I've been busy restocking my Etsy shop and will continue to add new items throughout the weekend. I hope you will stop in and enjoy browsing.

In previous posts, I've shared some of my projects and showcased special pieces. I would love for you to become a follower so you can stay updated on future projects and pieces.

I've decided to have a special giveaway for this inaugural expo!

Everyone who leaves a comment on this post by noon (ET) Monday, 9/28, will have a chance to win this Blue Willow heart shaped broken china pendant! The drawing will be held Monday evening (September 28) and the winner will be announced on Tuesday.


Blue Willow is one of my favorite china patterns to work with and I love how it looks in this heart shaped pattern - also my favorite shape! As you will see in my Etsy shop, I have a variety of patterns and shapes and will also work with you if you would like a special order.

Don't forget, for a chance to win the pendant above, leave a comment here before noon on Monday, 9/28.

After leaving your comment, follow the link above to return to the Expo home and visit the other vendors.

Getting Ready for the Expo!!

Remember, after midnight tonight, we will begin our Fall Business Women Expo sponsored by Runaka Designs and it will end on Sunday. I haven't decided what type of special I'll be having (a discount for my Etsy store or a giveaway) but you can be sure it will be a first for me!! I'll be updating my Etsy shop tonight with new, never before seen items.

Be sure to go to the Girls Night Out blog, visit all the vendors participating in the Expo and leave comments on their blogs. Can't wait to see you!!

Thursday, September 24, 2009

Fall Business Women Online Expo - Come Join Us Saturday!!


Runako Designs is graciously sponsoring a Fall Business Women Online Expo this weekend, September 26, for a special online girls night out. Please come by and join us for this exciting event and visit all the special women business owners who are showcased in this expo. Just click on the link above and take a virtual tour of the blogs of all these talented and wonderful women.

Remember visit the expo this weekend and visit all the great vendors! See ya then!

Sunday, September 13, 2009

Dragonflies

I've been following the very talented ladies over at the Stained Glass & Mosaics forum on GardenWeb. Take a look here to see what it's all about. There are some very creative people here that have loads of ideas and certainly don't mind sharing their secrets!

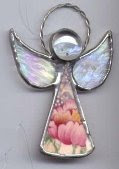
One of the ladies was making experimental dragonflies using old silverware spoons for the body. They turned out great so I just had to make one! Friday, on my lunch hour, I went to Goodwill to find the spoons. Dadgummit, somebody already grabbed the best spoons. Hmmm, I'll have to improvise a little, so I bought a couple of knives. The handles have great charm and I'm sure I can cut them. (I was so confident, I bought 2!!)


Mr. Man was working late so I knew I could make these before he got home. I rushed home, ignoring my need to workout (hey, it's Friday after all), and started working. I pulled out my hacksaw and started cutting......and cutting.....and cutting. Thank goodness I have a little contraption that could hold the knives steady for me while I cut....and cut.... and cut!
Finally, two handles are cut off and I used a file (probably not one for metal, but it worked) and smoothed down the cut ends a little.


Now, to pick out the glass for the wings, I think this iridized, textured glass scrap will work great!


This is going well and my timing is working out. Now, I have to find my wing patterns........... how frustrating when you are trying to rush to make a project and you can't find what you need.......
Searching, searching, searching.....how in the world did I collect so many patterns and why are there so many duplicate copies......certainly there are some dragonfly wings in one of these books......


No time to look anymore, I'll just draw some wings. Off to the computer to see what real dragonfly wings look like. Wow, what a variety of wings! Ok, just choose one pic and draw it, copy it, be sure to mark left side top, left side bottom, right side top, right side bottom ...... time's drawing near.

I rush back out to my shop and cut out the wings, placing them next to the body to envision the final creation:

Hmmm, not bad. Ok, I've already decided I would wrap the wings with U-came to make the process go faster, then solder the U-came to the body. I'm doing ok on time right now.

Great! The wing's wrapped and I take it to the soldering station to see if the solder will stick to the knife handle..........AARRRRGGGGGHHHH!!!

It won't work. Now Mr. Man is home and I'm so frustrated at this point that I just have to put it away. I spend the rest of the evening and all day Saturday trying to come up with some way that I can attach those wings. I've seen it done with wire but I've never used that technique. So, I mull it over in my mind and on Sunday afternoon I finally think I have the patience to work on it again.

Of course, I didn't take anymore pictures of the work in progress due to my previous failure. But, I did work with the wire, was able to finally get the wings attached and soldered a ring on it. All in all, I think the experiment turned out pretty well and I will probably make a few more to see how they sell at my uncoming show the end of October.


Now, I have to get back on track and get those business card holders finished and begin working on more items for the show.

~ til next time!

Tuesday, August 18, 2009

Make Your Own Personalized Photo Magnets

As promised, here are the instructions for making personalized photo magnets. But first a disclaimer ~ I apologize for the quality of the pictures. Not my best, but I was a little rushed and wanted to get these instructions on the blog promptly.

Ok, first is a list of materials you will need:

1. Glass. I went to the dollar store and purchased the $1 8 x 10 picture frames - with glass (some of these actually have a flimsy plastic for the glass). The glass in these inexpensive frames are usually just the right thickness for this project.

2. Glass cutter and oil. You can use an inexpensive pencil cutter for this project.

3. Cork backed metal ruler.

4. Sharpie marker.

5. Photographs, scrapbook papers, pictures from magazines, old greeting cards, dried flowers, vintage lace, vintage or new wallpaper scraps, etc. - you get the idea. Anything that you may want to put between two pieces of glass.

6. Copper foil. I usually use 1/4" foil. For making a decorative edge, I use 1/2" foil. You can easily find this at a local stained glass shop and sometimes at a hobby shop.

7. Pencil.

8. Adhesive backed magnet sheets.

That's it! Now let's get started.

First, decide what size you want your magnets. The ones I demonstrate are 3" x 2", just because that was most economical size for the magnet sheets I bought. Make them any size you want but if you make them much larger than 3" x 2", they may be too heavy for your magnets.

Using your ruler and Sharpie, mark your horizontal lines and score with your glass cutter along the edge of the ruler. Then turn the glass and mark your vertical lines and score those lines. Using your fingers, snap apart the glass.


Now that you have your glass pieces cut to size, gather your photos and embellishment materials:

photos


Using your glass pieces as patterns, cut out your photos and start embellishing:


cut photo embellish


To embellish the old photo above with a scalloped edge, use black construction paper and a pair of decorative scrapbook scissors as follows:


preparing trim photo trimmed


After you have your photos embellished, clean your glass using a glass cleaner and dry well. Insert your photos between two pieces of glass and, using a small strip of copper foil, tape the glass together on opposite sides:


sandwich tape


Now you're ready to foil! If you don't want a decorative edge, use the 1/4" foil and center the glass on the foil and wrap around the edges of the glass:


For a decorative edge, use the same scrapbook scissors, and trim the edge off the 1/2" wide foil. Cut pieces of the trimmed foil to the same size as each edge and lay the foil on the top edge of the glass then wrap around to adhere the foil to the back of the glass:


cut foil lay foil


After your glass pieces are foiled, burnish the foil by using a smooth sided pencil or your Sharpie to smooth and firmly adhere the foil to all sides of the glass (front, back and edges):


After you have burnished the edges of all the foil, cut your sheet magnet and attach to the back of the glass. There you have it ~ beautiful personalized photo magnets!


These could make great gifts for the holidays, new baby, house warming or "just because". Go around your town and take photographs of landmarks to make house warming gifts, or copy photos of the new baby, from the sonogram to birth, photograph your favorite sports team or use old holidary cards. The ideas are limitless!!


I realize some of the materials for this project may be hard to find. I have been considering putting together a kit with all the materials needed except for the photographs to put between the glass. If you are interested in a kit like this, leave me a comment. Also, please leave me a comment and let me know if this tutorial was helpful.

Monday, August 10, 2009

Make Your Own Broken China Jewelry


Am I crazy?!? I create broken china jewelry and now I'm ready to share my secrets so you can make your own. I'm not crazy. I just know there are so many talented people that want to make their own broken china jewelry but don't know where to start. I now have the solution for you. I've created an e-book that will show you step by step how to make your own jewelry and, you still have time to order the book, create your own pendants or ornaments and cross off those hard to buy for people on your holiday list.

In this book you will learn two different methods of cutting and shaping your china. I'll also show you how to foil, solder and finish your pendants or ornaments. This is such a fun art project and can be very personal. I'm sure you have some old china or know of the china patterns that your grandmothers may have treasured. Some of it may be chipped or cracked and is so precious you can't throw it away but there is nothing else you can do with it. Make it into keepsake jewelry or ornaments!

This e-book contains 36 pages of detailed instruction and almost 100 photographs to guide you. Also, I'm always available by e-mail to answer any questions that may come along.

Go to my Etsy shop here to order your copy ~


Also, I am putting together a great tutorial for making these personalized photo magnets.


Check back soon. I plan to have this tutorial up in a few days.

Tuesday, July 7, 2009

Fourth of July and Family Reunion!!

I know, I know, I'm late in wishing everyone a happy Fourth of July but I have a very good reason. You see, I've been extremely busy. I'm going to reveal a little something about myself ~ I'm a chronic procrastinator. No, I'm not proud of that, but when you find out what I've been doing, you'll see why I'm so late with my July 4th wishes.

My father's side of the family has a family reunion every Fourth of July (well, we just kinda barge in since my part of the family is really a brother of the person the reunion is named after - but if we know there's gonna be good food and we can somehow get invited, we're there)!

Anyway, this was a special reunion ~ the 100th consecutive year it has been held!!! 100 years!!! Can you believe that?

For such a special occasion, I decided to decorate the closest of my female relatives with special necklaces. That's where the procrastination comes in. I've had the idea rolling around my head for several months. I knew I wanted to make something with pictures, and I knew I wanted a necklace with some embellishments such as beads and a patriotic theme.

These pictures are of my parents, grandparents and great grand parents ~ don't you just love those old, old pictures? I just don't understand why nobody ever smiled way back then?!?

Well, I made a list of my closest female relatives and tallied up the number of necklaces I would need to make ~ a total of 15 (including myself, of course). Whew, so I did some more tallying and when I multiplied the number of photo charms per necklace by the number of necklaces - well, that was pretty ambitious! Especially when there's only 2 weeks before the reunion!! I began gathering my materials, cutting the glass, amassing the pictures I would use and, of course, not allowing myself enough time for any glitches. But, I actually got all the necklaces made, put them in pretty little boxes and even had time to make patriotic tags for each little box.
Here's the front and back of the final product!

Of course, some of the necklaces had different pictures, but you get the general idea. They were a big, big hit!
So, now that the Fourth and the reunion is over (we're still rubbing our pudgy little bellies from all those great homemade goodies), and now that I've had a little rest, I'll start working on my next project(s). I'll be taking new pictures and posting more jewelry in my Etsy shop and I also plan to fine tune my "How to Make Broken China Jewelry" e-book and get it posted. Keep watching here so you'll know when I post the new e-book and jewelry!